
Zesty Kiwi Citrus Popsicles Recipe
As the sun shines brighter and temperatures rise, there’s nothing quite as refreshing as a homemade popsicle. These delightful frozen treats are not only a nostalgic summer favorite but also a healthier alternative to store-bought options, which often contain artificial flavors and excessive sugars. Homemade popsicles allow you to control the ingredients, making them a guilt-free indulgence that can be enjoyed all year round. Among the myriad of flavor combinations, the Zesty Kiwi Citrus Popsicles stand out, offering a vibrant blend of sweetness and tartness that is both invigorating and satisfying.
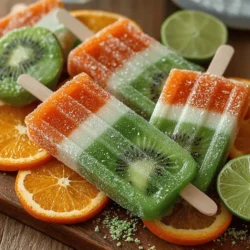
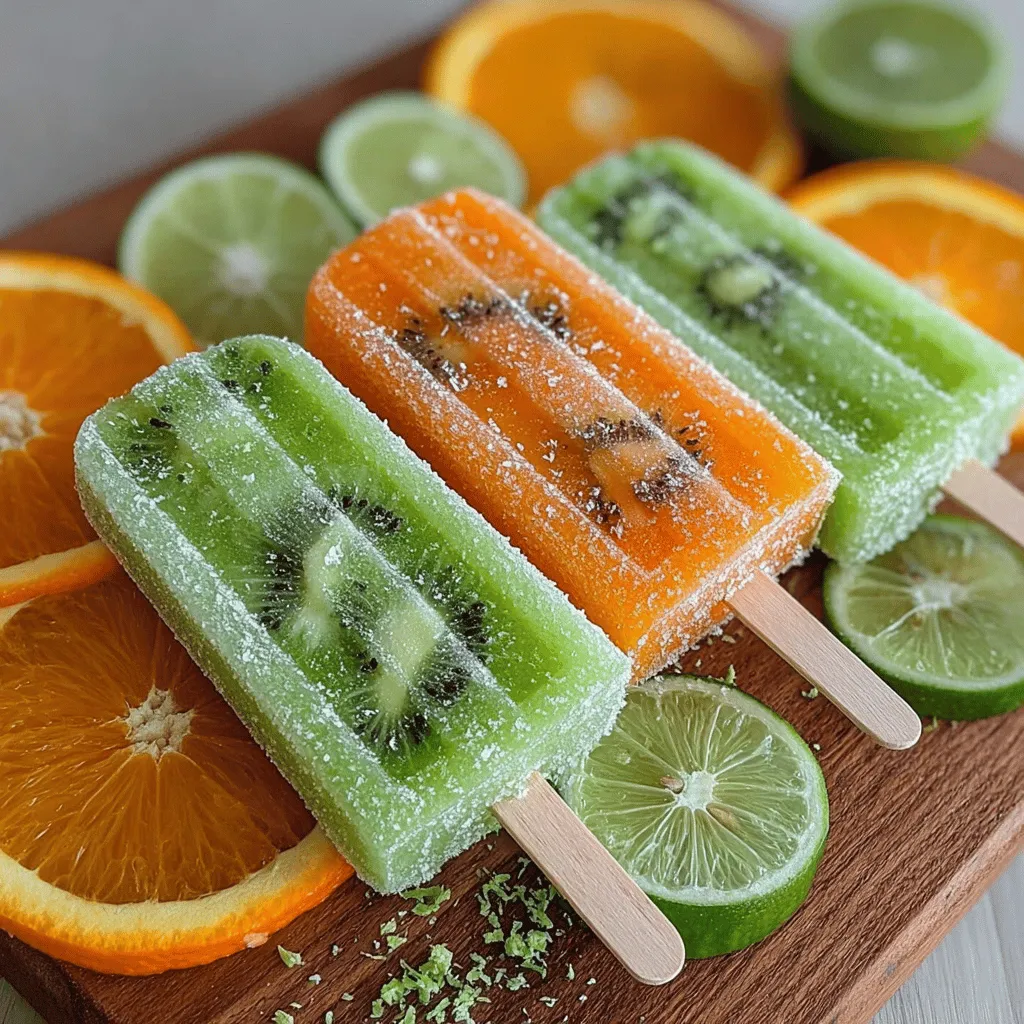
This recipe brilliantly marries the tropical notes of kiwis with the bright, tangy essence of citrus. The result? A refreshing popsicle that is perfect for cooling down on a hot day or serving as a nutritious snack for kids and adults alike. Each bite is bursting with flavor, making it a delightful treat that is sure to please any crowd. Moreover, the vibrant green of kiwis paired with the sunny hues of oranges and limes creates a visually appealing dessert that’s as pleasing to the eye as it is to the palate.
One of the best aspects of this Zesty Kiwi Citrus Popsicles recipe is its simplicity. The preparation is quick and easy, making it accessible for cooks of all skill levels. Whether you are a seasoned chef or a novice in the kitchen, you’ll find that this recipe requires minimal effort and time. With just a handful of fresh ingredients and a few simple steps, you can whip up a batch of these delicious popsicles in no time.
Understanding the Ingredients
To create the perfect Zesty Kiwi Citrus Popsicles, it’s essential to understand the key ingredients that contribute to both the flavor and health benefits of this treat. Let’s delve into each ingredient’s role and advantages.
Kiwis: The star of this recipe, kiwis are not only delicious but also packed with nutrition. These small, brown fruits are rich in Vitamin C, providing more than your daily requirement in just one serving. They are also high in dietary fiber, which aids digestion, and antioxidants that help combat free radicals in the body. The vibrant green flesh and tiny black seeds add a unique texture and visual appeal to your popsicles.
Fresh Orange Juice: Bringing a burst of sweetness and tanginess, fresh orange juice is another key ingredient. It is an excellent source of Vitamin C, which boosts the immune system and enhances skin health. Using fresh orange juice instead of bottled juice ensures that you avoid added sugars and preservatives, resulting in a cleaner flavor profile.
Honey or Agave Syrup: For those looking to sweeten their popsicles, natural sweeteners like honey or agave syrup are ideal choices. Both options provide a hint of sweetness without the unnecessary additives found in processed sugars. Honey also has antibacterial properties and can soothe sore throats, while agave syrup is lower on the glycemic index, making it a suitable choice for those monitoring their blood sugar levels.
Lime: Adding a touch of brightness, lime juice not only enhances the flavor but also contributes additional Vitamin C. Its tangy zest balances the sweetness of the fruits, creating a well-rounded flavor profile. Plus, the acidity of lime helps to elevate the overall taste experience.
Coconut Water: This ingredient is optional but highly recommended for those looking to add a tropical flair and extra hydration. Coconut water is naturally low in calories and packed with electrolytes, making it an excellent choice for rehydration, especially during hot summer days.
A Pinch of Salt: While it may seem counterintuitive to add salt to a sweet treat, a pinch of salt can enhance the overall flavors and create a more balanced taste. Salt amplifies sweetness while helping to mask any bitterness from the citrus, resulting in a harmonious blend of flavors.
Step-by-Step Guide to Making Zesty Kiwi Citrus Popsicles
Now that we have a good understanding of the ingredients, let’s dive into the step-by-step process of making these refreshing Zesty Kiwi Citrus Popsicles.
Preparing the Kiwis: Start by selecting ripe kiwis for the best flavor and texture. Look for kiwis that yield slightly to gentle pressure, indicating they are ready to eat. To peel the kiwis, you can use a vegetable peeler or simply cut them in half and scoop out the flesh with a spoon. Once peeled, chop the kiwis into smaller pieces for easier blending.
When it comes to blending, you have the option of creating a smooth puree or leaving it slightly chunky for added texture. If you prefer a smoother popsicle, blend the kiwis until completely liquefied. For those who enjoy a bit of bite, pulse the blender a few times until the desired consistency is reached.
Mixing the Juices: The next step involves preparing the juice mixture. Freshly squeezed juice is crucial for achieving a vibrant flavor. Squeeze the juice from a few oranges and limes, ensuring there are no seeds, and combine them in a mixing bowl. It’s essential to whisk the juices together with your choice of sweetener until fully incorporated. This ensures that the sweetness is evenly distributed throughout the mixture, providing a consistent taste in every popsicle.
Combining Mixtures: After preparing the kiwi puree and the citrus juice mixture, it’s time to combine them. Pour the kiwi puree into the bowl with the mixed juices, and gently stir until just combined. Be careful not to over-mix; you want to maintain some of the beautiful color variations and textures. The blend of greens and yellows creates a visually stunning mixture that will make your popsicles even more enticing.
Preparing the Molds: Finally, it’s time to pour your mixture into popsicle molds. If you don’t have traditional molds, you can use small paper cups or ice cube trays with sticks inserted. Fill the molds to about three-quarters full, leaving some space for expansion as they freeze. If desired, you can add slices of kiwi or citrus to the molds for an extra touch of beauty and flavor.
Now that you have prepared your popsicle mixture and molds, you are on your way to enjoying these refreshing Zesty Kiwi Citrus Popsicles. The next step is to freeze them until solid, but that’s a delicious detail for the next part of this recipe. Enjoy the anticipation of tasting these delightful treats!
Choosing Your Molds: Popsicle Molds vs. Small Cups
When it comes to making Zesty Kiwi Citrus Popsicles, the choice of mold can significantly impact your final product. You have two main options: traditional popsicle molds or small cups.
Popsicle Molds
Pros:
– Shape & Size: Popsicle molds typically come in a variety of shapes and sizes, allowing for creative presentations.
– Sticks Included: Most molds come with integrated sticks, making the assembly process easier.
Cons:
– Storage: Depending on the size of your freezer, these molds can take up more space than small cups.
Small Cups
Pros:
– Flexibility: Small cups are readily available in most kitchens, making them an accessible option.
– Customization: You can create different flavors in various cups, allowing for a fun tasting experience.
Cons:
– Sticks Not Included: You would need to provide your own sticks, and they might not fit snugly without additional support.
Pouring the Mixture
Once you have chosen your mold, it’s time to pour in your zesty kiwi citrus mixture. Here are some guidelines to ensure optimal results:
1. Leave Space for Expansion: When pouring the mixture into your molds or cups, it’s crucial to leave about half an inch of space at the top. This allows the mixture to expand as it freezes, preventing overflow and mess.
Inserting Sticks
Properly inserting sticks is key to ensuring that your popsicles are easy to enjoy once frozen.
1. For Popsicle Molds: If you’re using traditional molds, they typically come with sticks that can be inserted directly after pouring the mixture. Wait for about 30-60 minutes until the mixture has begun to set but is not completely solid. This will help hold the sticks upright.
2. For Makeshift Molds: If you opted for small cups, use wooden craft sticks or plastic spoons. After pouring your mixture, wait for the popsicle to start freezing (about 1-2 hours) before inserting the stick. This will help stabilize it, keeping it centered.
Tips for Ensuring Sticks Remain Upright
To ensure that your sticks stay upright during freezing, consider these tips:
– Use a Piece of Foil: For small cups, cover the top with a piece of aluminum foil and poke the stick through it. This will hold the stick in place until the popsicles are fully frozen.
– Check Stability: Before placing your molds in the freezer, gently tug on the sticks to ensure they are stable and won’t tip over.
Freezing the Popsicles
The freezing process is essential for achieving the perfect texture for your Zesty Kiwi Citrus Popsicles.
1. Recommended Freezing Time: Allow your popsicles to freeze for at least 4-6 hours. For best results, leave them overnight.
2. Signs They Are Ready: You’ll know your popsicles are ready when they are completely firm to the touch and the mixture has turned icy. If you gently squeeze the mold, it should retain its shape without any give.
3. Importance of Patience: While it may be tempting to rush the process, patience is crucial for achieving the right texture. Fast freezing can lead to ice crystals, resulting in a less enjoyable eating experience.
Unmolding and Serving
Once the freezing process is complete, it’s time to enjoy your homemade popsicles. Here are some techniques for easy unmolding:
1. Warm Water Method: To remove popsicles from molds, briefly dip the molds in warm water for 10-20 seconds. This helps loosen the popsicle without damaging it.
2. Twist and Pull: If using a popsicle mold, gently twist the stick while pulling it out. For small cups, you can squeeze the sides of the cup to release the popsicle.
Serving Suggestions
Presentation can elevate your popsicle experience. Here are some serving suggestions:
– Display on a Platter: Arrange your popsicles on a colorful platter surrounded by fresh kiwi slices and citrus wedges for a vibrant display.
– Drizzle with Honey or Agave: For added sweetness, consider drizzling your popsicles with honey or agave syrup before serving.
– Garnish with Fresh Herbs: Add a mint or basil leaf on top of each popsicle for a refreshing garnish that enhances the flavor.
Health Benefits of Zesty Kiwi Citrus Popsicles
Not only are these popsicles delicious, but they also boast several health benefits.
Nutritional Profile
– Kiwi: Packed with vitamin C, fiber, and antioxidants, kiwis are known to support immune health and digestive wellness.
– Citrus Fruits: The addition of lemons and limes provides a rich source of vitamin C and flavonoids, which can help reduce inflammation and boost overall health.
Caloric Content & Sugar Levels
Homemade popsicles typically contain fewer calories and sugars compared to store-bought versions, which often contain preservatives and artificial flavors. Each popsicle made from our recipe has approximately 50-60 calories, depending on the level of added sweeteners.
Comparison to Store-Bought Popsicles
Homemade popsicles offer the advantage of knowing exactly what ingredients you’re consuming, allowing you to control sugar levels and avoid artificial additives. This makes them a healthier choice for both kids and adults.
Dietary Considerations
The Zesty Kiwi Citrus Popsicles are naturally vegan and gluten-free, making them suitable for a variety of dietary restrictions. You can easily customize the recipe to fit your needs, whether you’re looking to reduce sugar or incorporate alternative sweeteners like agave or stevia.
Creative Variations of the Recipe
The versatility of this popsicle recipe allows for endless customization. Here are a few creative variations:
Seasonal Swaps
– Fruits: Depending on what’s in season, consider swapping kiwi for strawberries, peaches, or mangoes. Each fruit will add its unique flavor and nutritional benefits.
Adding Herbs or Spices
– Herbs: For a refreshing twist, add fresh mint or basil leaves to the mixture before blending. The herbal notes will complement the citrus beautifully.
– Spices: A pinch of ginger or cayenne can add a surprising kick, enhancing the overall flavor profile.
Incorporating Other Liquids
– Yogurt: For a creamier texture, mix in Greek yogurt or coconut yogurt. This not only provides a smooth mouthfeel but also adds protein to the popsicles.
– Juices: Experiment with different fruit juices, such as coconut water or pomegranate juice, for varied flavors and health benefits.
Conclusion
Creating Zesty Kiwi Citrus Popsicles at home is a straightforward and rewarding process. Not only do these popsicles offer a refreshing treat on a hot day, but they also provide a wealth of nutritional benefits that far surpass their store-bought counterparts.
The versatility of this recipe encourages you to experiment with different flavors and ingredients, allowing for personalized creations that suit your taste. Whether you’re enjoying them poolside or as a healthy snack, these popsicles are a delightful way to incorporate fresh fruit into your diet. So gather your ingredients, choose your molds, and start making these delicious and nutritious popsicles today!