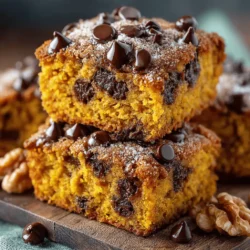

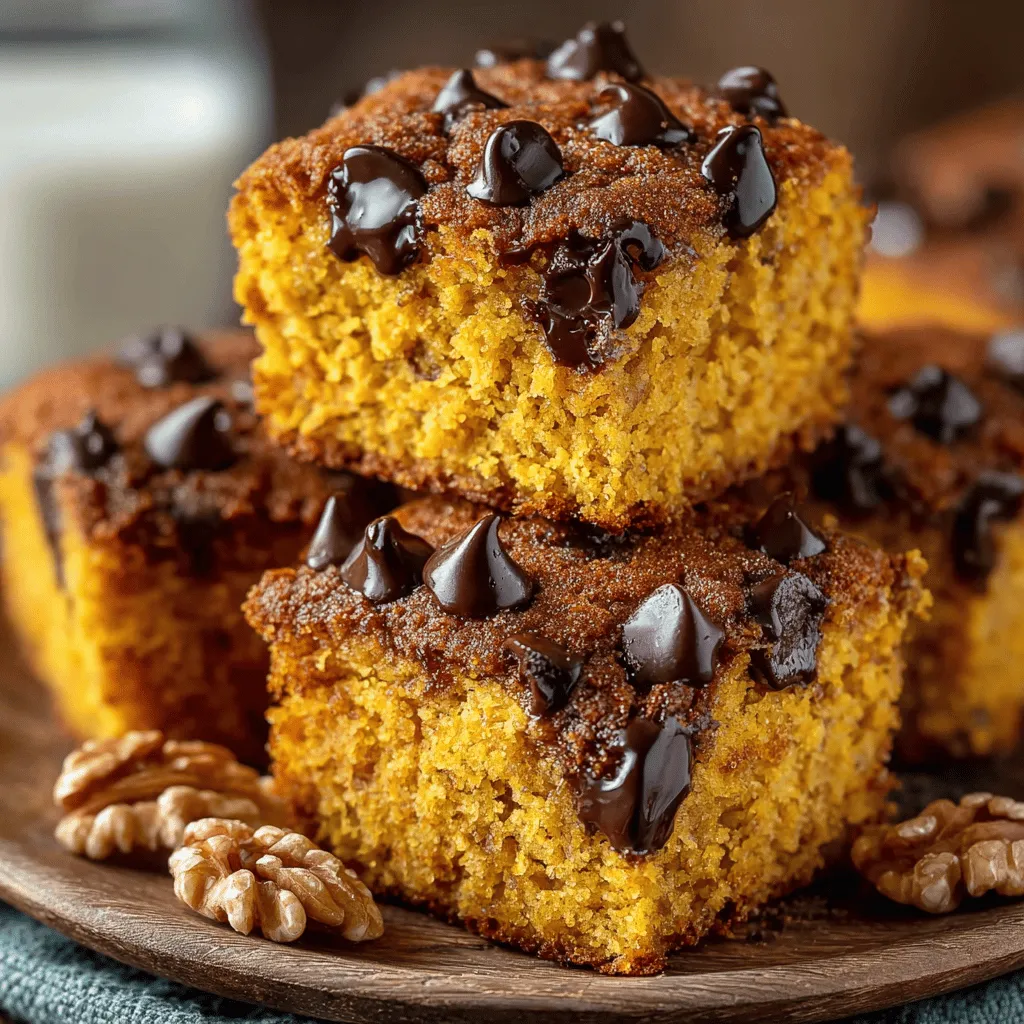
Pumpkin Chocolate Chip Snack Squares: A Delicious Autumn Treat
As the leaves begin to change and the air turns crisp, there’s nothing quite like the warm, comforting aroma of freshly baked goods wafting through the kitchen. One recipe that perfectly embodies the essence of the fall season is Pumpkin Chocolate Chip Snack Squares. These delightful treats not only satisfy your sweet tooth but also celebrate the rich flavors of autumn. The combination of moist pumpkin and rich chocolate creates a snack that is both indulgent and wholesome, making it a favorite for family gatherings, holiday parties, or even a simple afternoon snack.
The Allure of Pumpkin in Baking
Pumpkin has long been a staple in autumnal baking, and for good reason. This vibrant orange vegetable is packed with nutritional benefits. It is high in vitamins A and C, fiber, and antioxidants, making it a health-conscious addition to your favorite recipes. In addition to its health benefits, pumpkin has a naturally sweet and earthy flavor that enhances the taste of baked goods. The historical context of pumpkin in baking dates back centuries, with early American settlers utilizing this versatile ingredient in various dishes, from savory pies to sweet desserts.
What makes pumpkin especially appealing is its ability to pair harmoniously with other flavors, particularly chocolate. The rich, creamy texture of pumpkin complements the deep, indulgent notes of chocolate, creating a balance that is both satisfying and decadent. This pairing is not only delicious but also allows you to enjoy a treat that feels indulgent while still incorporating the wholesome goodness of pumpkin.
Ingredients Breakdown
To create your own Pumpkin Chocolate Chip Snack Squares, let’s take a closer look at the key ingredients that make this recipe a standout.
– Canned Pumpkin Puree: The star ingredient of this recipe is canned pumpkin puree. When choosing pumpkin puree, look for 100% pure pumpkin without any added sugars or spices. This will ensure you have control over the flavor and sweetness levels in your snack squares. Canned pumpkin is not only convenient but also provides a consistent texture and moisture that fresh pumpkin may lack.
– Coconut Oil: This recipe calls for coconut oil, which adds a subtle flavor and healthy fats to your squares. Coconut oil is known for its ability to enhance moisture and tenderness in baked goods. If you’re looking for alternatives, unsalted butter or vegetable oil can also be used, though they may impart a slightly different flavor.
– Sugars: A combination of granulated sugar and brown sugar is used to achieve the perfect balance of sweetness and texture. Granulated sugar provides structure, while brown sugar adds moisture and a hint of caramel flavor. This combination ensures that your snack squares are not only sweet but also chewy and satisfying.
– Eggs: Eggs play a crucial role in this recipe, acting as a binding agent that holds the ingredients together. They also contribute moisture and richness to the final product. Be sure to use large eggs for consistency in baking.
– Spices: The inclusion of warm spices such as cinnamon, nutmeg, and ginger elevates the flavor profile of the snack squares, giving them that classic fall taste. These spices not only enhance the sweetness of the pumpkin but also add depth and warmth to the overall flavor.
– Optional Ingredients: For those who love a bit of crunch, consider adding chopped nuts, such as walnuts or pecans. Nuts not only add texture but also provide healthy fats and additional flavor. If you prefer a nut-free version, feel free to skip this ingredient.
Equipment You’ll Need
Before diving into the baking process, it’s important to gather the necessary kitchen tools to ensure an efficient and enjoyable baking experience. Here’s what you’ll need:
– Mixing Bowls: A set of mixing bowls in various sizes will be essential for combining your ingredients. A large bowl for the wet ingredients and a smaller bowl for the dry ingredients will help keep your process organized.
– Whisk and Spatula: A whisk is ideal for blending the wet ingredients, while a spatula is perfect for folding in the dry ingredients and ensuring everything is well combined without overmixing.
– Baking Pan: A 9×9-inch baking pan works perfectly for these snack squares. Lining the pan with parchment paper will help prevent sticking and make cleanup a breeze.
– Oven Thermometer: If you want to ensure accurate baking temperatures, consider using an oven thermometer. This tool can help you achieve perfectly baked squares without the guesswork.
With your ingredients and equipment ready, it’s time to preheat the oven and get started on the delightful journey of making Pumpkin Chocolate Chip Snack Squares.
Step-by-Step Instructions
1. Preheating the Oven
Preheating your oven is a crucial first step in the baking process. It ensures that your Pumpkin Chocolate Chip Snack Squares bake evenly and achieve the perfect texture. Set your oven to 350°F (175°C) and give it ample time to reach the desired temperature before placing your pan inside.
2. Mixing the Wet Ingredients
In a large mixing bowl, combine the canned pumpkin puree, melted coconut oil, and sugars. Use a whisk to blend these ingredients until you achieve a smooth, homogenous mixture. This step is essential for incorporating the flavors and ensuring that the sugars dissolve properly into the wet ingredients.
3. Adding Eggs and Vanilla
Once your wet mixture is smooth, it’s time to add the eggs and vanilla extract. Crack the large eggs into the bowl one at a time, whisking thoroughly after each addition to maintain an even consistency. The vanilla extract adds a lovely aroma and enhances the overall flavor profile of the snack squares.
By following these initial steps, you are well on your way to creating a batch of delicious Pumpkin Chocolate Chip Snack Squares that will delight your family and friends. The combination of pumpkin and chocolate, paired with warm spices, makes this recipe a perfect autumn treat that you’ll want to make time and time again. Stay tuned for the next part, where we’ll continue with the dry ingredients and complete the baking process!
How to Incorporate Eggs Effectively
When baking Pumpkin Chocolate Chip Snack Squares, the eggs are essential for binding the ingredients together and providing moisture. Start by cracking your eggs into a mixing bowl. For the best results, allow your eggs to come to room temperature before mixing. This temperature helps them blend more smoothly into the batter. Whisk the eggs lightly until they are just combined—this will introduce air into the mixture, which aids in creating a light texture for the snack squares.
Combining Dry Ingredients
Before you start mixing your batter, it’s crucial to combine your dry ingredients properly. In a separate bowl, whisk together the flour, baking powder, baking soda, cinnamon, nutmeg, and salt. This step not only ensures that all the leavening agents are evenly distributed but also enhances the flavor profile of your squares.
Explanation of Sifting and Its Benefits
Sifting flour and dry ingredients can be a game changer. When you sift, you aerate the flour, which helps avoid clumps and ensures your snack squares have a light and fluffy texture. Additionally, sifting can help remove any impurities or larger particles that may have collected in your flour. If you have a fine-mesh sieve, use it to sift your dry ingredients into the bowl before whisking them together.
Merging Wet and Dry Ingredients
Once your dry ingredients are ready, it’s time to combine them with your wet ingredients. In your mixing bowl, you should have your pumpkin puree, sugar, eggs, and melted butter. Slowly add the dry mixture into the wet ingredients, using a spatula or wooden spoon. Be careful to incorporate them gently; this is where you can easily overmix.
Importance of Mixing Without Overdoing It
Overmixing can lead to dense and tough snack squares. You want to mix just until you see no more dry flour—this ensures that the gluten in the flour has not developed too much, which keeps your squares tender and soft.
Folding in Chocolate Chips and Nuts
Now comes the fun part: folding in your chocolate chips and, if desired, nuts. This step adds delightful texture and flavor to each bite. Use a spatula to gently fold the chocolate chips into the batter. If you’re using nuts, like walnuts or pecans, make sure to chop them coarsely so they can be evenly distributed throughout the batter.
Tips for Even Distribution in the Batter
To ensure an even distribution of chocolate chips and nuts, sprinkle them over the batter before folding. This method helps prevent clumping, allowing every square to have a delicious mix of flavors. Be gentle during this process to keep the batter fluffy.
Pouring and Spreading the Batter
Once your batter is well mixed, it’s time to pour it into your prepared baking pan. Use a spatula to scrape all of the batter into the pan. Start by pouring it into the center of the pan, and then gently spread it out to the edges. Make sure to create an even layer across the surface of the pan.
Ensuring an Even Bake with Proper Spreading Techniques
For an even bake, it’s important to spread the batter uniformly. Use the back of your spatula to smooth the surface, ensuring that the batter reaches the corners of the pan. This technique minimizes the risk of uneven baking and provides a perfect texture throughout.
Baking to Perfection
Preheat your oven to 350°F (175°C) and place your pan on the center rack. Baking time may vary, but typically, your Pumpkin Chocolate Chip Snack Squares will take about 25 to 35 minutes to bake.
Signs of Doneness and Importance of Toothpick Test
Keep an eye on your snack squares as they bake. They’re done when the edges begin to pull away from the sides of the pan and the center is set. To confirm they are fully baked, insert a toothpick into the center. If it comes out clean or with a few moist crumbs, your snack squares are ready. If it comes out with wet batter, give them a few more minutes.
Cooling and Cutting
Once baked, remove the snack squares from the oven and let them cool in the pan for about 10-15 minutes. This cooling period allows the squares to set further, making them easier to cut. To remove the squares from the pan, run a knife along the edges to loosen them. Transfer them to a wire rack to cool completely.
Techniques for Optimal Cooling and Presentation
For the best presentation, allow the squares to cool completely before cutting them into squares. This not only helps with presentation but also enhances the texture. If you cut them while they’re still warm, they might crumble or fall apart.
Serving Suggestions
Now that you have your delicious Pumpkin Chocolate Chip Snack Squares ready, consider how best to serve them. These squares are incredibly versatile and can be served in numerous ways.
– Ideas for Serving the Snack Squares: Serve them warm with a drizzle of caramel sauce or a dusting of powdered sugar for a delightful treat. You can also serve them alongside a dollop of whipped cream for added indulgence.
– Pairing with Beverages: These snack squares pair beautifully with a cup of coffee, tea, or a refreshing glass of milk. The rich flavors of pumpkin and chocolate complement the warmth of your beverage perfectly.
– Ideal Occasions for Serving: They make for an excellent snack for gatherings, potlucks, or even as a delightful dessert after dinner. Their seasonal flavor makes them a favorite during the fall, but they can be enjoyed year-round.
Storing and Freezing Pumpkin Chocolate Chip Snack Squares
To keep your Pumpkin Chocolate Chip Snack Squares fresh, it’s essential to store them properly.
Best Practices for Storage to Maintain Freshness
Once cooled, store the squares in an airtight container at room temperature for up to three days. If you want to keep them for longer, consider refrigerating them, where they can last for about a week. Just be sure to separate layers with parchment paper to prevent sticking.
How to Freeze for Longer Shelf Life
To freeze your snack squares, wrap them tightly in plastic wrap and then place them in a freezer-safe bag or container. This method helps prevent freezer burn and keeps them fresh for up to three months.
Thawing and Reheating Tips
When you’re ready to enjoy your frozen squares, simply remove them from the freezer and let them thaw at room temperature. If you prefer them warm, you can reheat them in the microwave for a few seconds or place them in a preheated oven at 350°F (175°C) for about 10 minutes.
Healthier Variations
If you’re looking to make your Pumpkin Chocolate Chip Snack Squares a bit healthier, there are several easy substitutions you can try.
Suggestions for Substitutions
– Gluten-Free Options: Substitute all-purpose flour with a 1:1 gluten-free baking mix to create a gluten-free version of this recipe. Make sure the mix contains xanthan gum to help with texture.
– Reducing Sugar Without Sacrificing Flavor: You can decrease the sugar content by using unsweetened applesauce or mashed bananas to replace some of the sugar. This will also add moisture to the squares.
– Incorporating Additional Spices or Flavors: Feel free to experiment with spices like ginger or allspice for a unique flavor twist. Adding vanilla extract can also enhance the overall taste.
Conclusion
Pumpkin Chocolate Chip Snack Squares are not just a treat; they are a delicious way to celebrate the flavors of fall. Their moist texture and rich taste make them a versatile option for any occasion, whether as a snack, dessert, or a delightful addition to gatherings.
Don’t hesitate to experiment with the recipe, making it your own by trying different variations or serving suggestions. The joy of baking is in the creativity it inspires, and these snack squares are sure to become a seasonal favorite that you can share with loved ones. Enjoy the satisfaction of homemade treats and the warmth they bring to your table!