
Introduction: The Joy of Frozen Treats
When the temperatures rise and the sun shines brightly, nothing satisfies quite like a refreshing frozen treat. However, indulging in desserts during the warmer months doesn’t have to mean compromising on health. Enter frozen yogurt treats — a delightful and nutritious way to enjoy a sweet snack while still keeping an eye on your dietary choices. As the popularity of frozen yogurt continues to soar, many are discovering the benefits of making these treats at home. Among the simplest and most satisfying options is the Frozen Chocolate Chip Yogurt Disc, a versatile dessert that is perfect for family gatherings, summer afternoons, or even a quick, guilt-free snack.
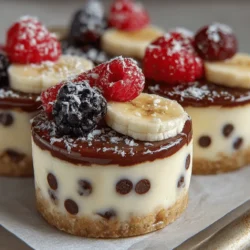
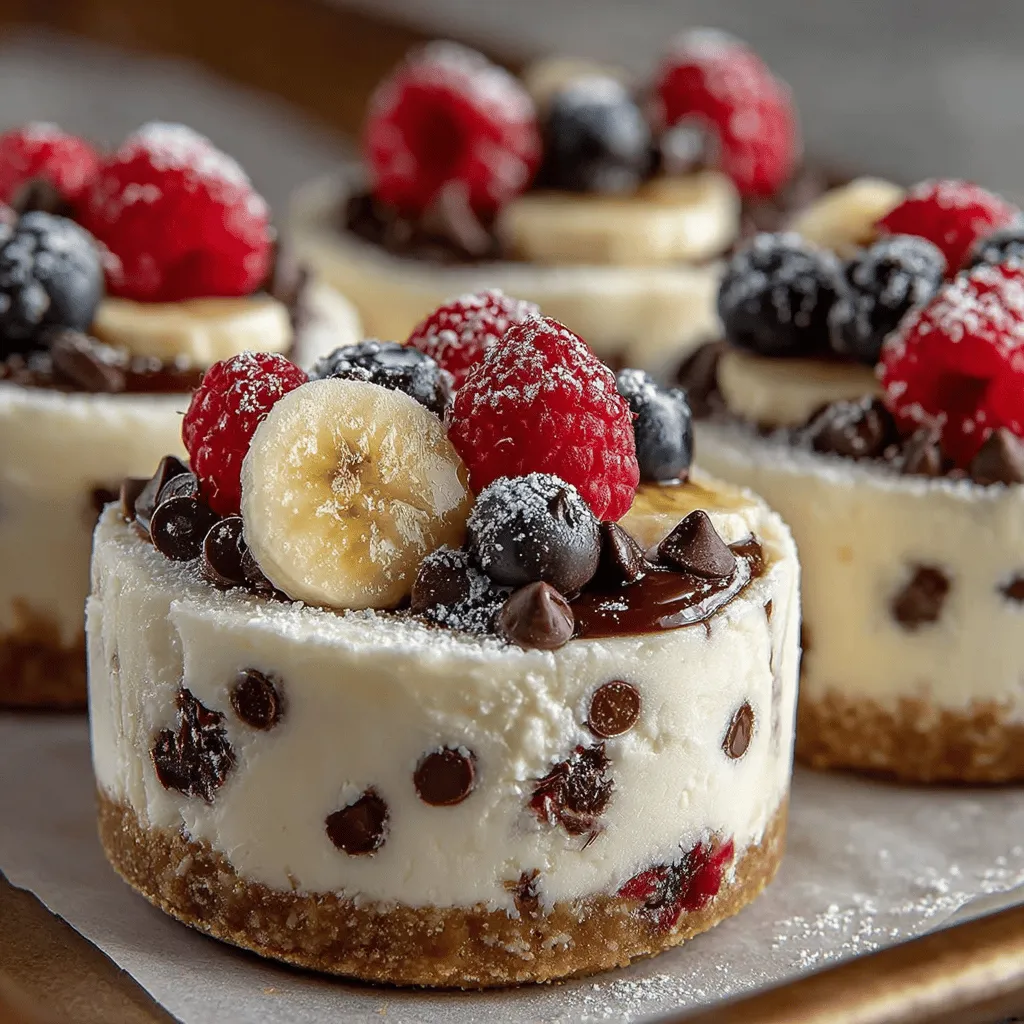
Frozen Chocolate Chip Yogurt Discs are an innovative take on traditional frozen desserts, combining the creamy goodness of yogurt with the rich taste of chocolate chips. The beauty of this recipe lies in its simplicity: with just a handful of ingredients and minimal preparation, you can create a deliciously satisfying treat that appeals to both children and adults alike. Whether you’re looking for a way to cool off on a hot day or seeking a healthier dessert alternative, these yogurt discs are sure to hit the spot.
The Benefits of Using Greek Yogurt in Recipes
At the heart of this delightful recipe is Greek yogurt, a powerful ingredient that is not only tasty but also packed with nutritional benefits. Unlike traditional yogurts, Greek yogurt is strained to remove excess whey, resulting in a thicker texture and higher protein content. This makes it an excellent choice for those looking to increase their protein intake while enjoying a sweet treat. In fact, Greek yogurt can contain up to twice the protein of regular yogurt, making it a filling option that can keep you satisfied for longer.
Additionally, Greek yogurt is known for its probiotic properties, which promote gut health and digestion. Probiotics are beneficial bacteria that can enhance your digestive system and boost your immune response, making Greek yogurt a smart addition to your diet. Moreover, it typically contains less sugar than many flavored yogurts, allowing you to indulge without the guilt of excessive sugar consumption.
These qualities make Greek yogurt an incredibly versatile ingredient, suitable for a range of recipes beyond breakfast. Whether used in smoothies, salad dressings, or baked goods, Greek yogurt elevates dishes with its creamy texture and nutritional profile. As you explore the world of frozen treats, it becomes clear that incorporating Greek yogurt into your recipes is an excellent way to enjoy indulgence while still adhering to a healthier lifestyle.
Ingredients Breakdown: Choosing the Best Components
Creating the perfect Frozen Chocolate Chip Yogurt Discs starts with understanding each ingredient and how it contributes to the final product. Let’s take a closer look at the key components that make this treat not only delicious but also nutritious.
– Greek Yogurt: The foundation of this recipe, Greek yogurt comes in various types — plain, flavored, and even dairy-free options. Choosing plain Greek yogurt allows you to control the sweetness and flavor profile of your discs, while flavored varieties can add a unique twist. Those with dietary restrictions can opt for dairy-free alternatives made from almond, coconut, or cashew milk, which can also lend a delightful flavor to the yogurt discs.
– Sweeteners: When it comes to sweetening your yogurt mixture, honey and maple syrup are two popular choices. Honey offers a floral sweetness and is known for its antioxidant properties, while maple syrup provides a rich, caramel-like flavor. Both options are natural sweeteners that can enhance the taste of your yogurt, but it’s important to consider their flavor profiles and how they complement the other ingredients.
– Vanilla Extract: A splash of vanilla extract can transform the flavor of your yogurt discs. It adds a warm, aromatic quality that pairs beautifully with chocolate. When selecting vanilla extract, opt for pure vanilla extract over imitation varieties whenever possible. Pure vanilla is derived from real vanilla beans and offers a more complex and authentic flavor.
– Chocolate Chips: The choice of chocolate chips can significantly impact the overall taste of your yogurt discs. Dark chocolate chips provide a rich, slightly bitter flavor that balances well with the creaminess of yogurt, while milk chocolate chips offer a sweeter profile. For those with dietary restrictions, dairy-free or vegan chocolate options are widely available, allowing everyone to enjoy this treat.
– Fresh Fruit Additions: To elevate your Frozen Chocolate Chip Yogurt Discs even further, consider incorporating fresh fruit. Berries, bananas, or mango can add natural sweetness, vibrant colors, and an extra dose of vitamins. Not only do these fruits enhance the flavor and texture of your discs, but they also contribute additional health benefits, making your frozen treat even more nutritious.
Step-by-Step Instructions for Creating Frozen Chocolate Chip Yogurt Discs
Now that you have a solid understanding of the ingredients, it’s time to dive into the step-by-step process of making Frozen Chocolate Chip Yogurt Discs. This guide will ensure you achieve the perfect texture and flavor, resulting in a treat that’s sure to impress.
– Preparing the Yogurt Mixture: Start by selecting your Greek yogurt base. If you’re using plain yogurt, you may want to add your sweetener and vanilla extract directly to it. In a mixing bowl, combine the Greek yogurt, sweetener, and vanilla extract. Use a whisk or spatula to achieve a smooth and well-combined mixture. It’s important that there are no lumps, as this will ensure a uniform texture in the final product.
– Folding in Extras: Once your yogurt mixture is smooth, it’s time to fold in the chocolate chips and any fresh fruit you’ve chosen to include. Be gentle during this process to maintain the integrity of the yogurt. A folding technique involves using a spatula to lift and turn the mixture over itself, incorporating the chocolate chips and fruit without deflating the yogurt.
– Shaping the Discs: To create uniform discs, line a baking sheet with parchment paper. Using a spoon or ice cream scoop, portion out the yogurt mixture onto the prepared sheet, shaping each disc to your desired thickness. A thickness of about half an inch is ideal for achieving a creamy texture that freezes well. Ensure there’s enough space between each disc, as they will expand slightly during the freezing process.
These initial steps set the stage for a delicious and refreshing frozen treat that you can enjoy anytime. With a focus on using nutritious ingredients, the Frozen Chocolate Chip Yogurt Discs offer a guilt-free way to satisfy your sweet tooth while indulging in the joys of homemade frozen desserts.
Freezing Process
To achieve the perfect Frozen Chocolate Chip Yogurt Discs, understanding the freezing process is key. Proper spacing and timing can significantly enhance the quality of your treats. Here are some best practices to follow:
1. Spacing on the Baking Sheet: When placing the dollops of yogurt on the baking sheet, ensure there is enough space between each disc. A good rule of thumb is to leave about 1 to 2 inches of space. This prevents the discs from merging together as they freeze, allowing for easy removal later.
2. Freezing Time: For optimal results, freeze the yogurt discs for at least 2 to 3 hours. This timeframe allows them to solidify completely. If you prefer them to be firmer, you can leave them in the freezer longer. However, avoid exceeding a 24-hour freeze to maintain texture and flavor.
3. Check for Doneness: To check if your discs are properly frozen, simply touch one with a fork or your finger. If it feels solid and doesn’t stick, they are ready to be removed from the baking sheet.
4. Batch Freezing: If you’re making multiple batches, consider using multiple baking sheets or trays. This allows you to freeze more discs at once and reduces the wait time between batches.
Creative Variations for Frozen Yogurt Discs
One of the best aspects of Frozen Chocolate Chip Yogurt Discs is their versatility. You can easily customize the recipe to suit your taste preferences or dietary needs. Here are some creative variations to inspire your next batch:
Flavor Infusions
Experimenting with flavor infusions can elevate your yogurt discs to new heights. Here are some ideas:
– Extracts: Add a few drops of vanilla, almond, or mint extract to the yogurt mixture for a unique twist. Almond extract, in particular, pairs wonderfully with chocolate, giving your discs a delightful nutty flavor.
– Spices: Incorporate ground spices such as cinnamon or nutmeg to add warmth and depth. A pinch of cinnamon can enhance the sweetness of the yogurt, making it a comforting treat.
Mix-ins
Mix-ins not only add texture but also enhance the nutritional profile of your treats. Consider these alternatives:
– Nuts: Chopped almonds, walnuts, or pecans provide a satisfying crunch. They also add healthy fats and protein, making your yogurt discs even more nutritious.
– Seeds: Incorporating chia seeds or flaxseeds can boost the fiber content while adding a unique texture.
– Granola: For a delightful crunch, sprinkle some granola on top of the yogurt before freezing. This not only adds flavor but also turns your discs into a more substantial snack.
Seasonal Fruits
Utilizing seasonal fruits not only enhances the flavor of your yogurt discs but also boosts their nutritional value. Here are some ideas based on the time of year:
– Spring/Summer: Fresh berries such as strawberries, blueberries, and raspberries work beautifully. Simply chop them into small pieces and mix them into the yogurt before freezing.
– Fall: Diced apples or pears can add a crisp texture, while a sprinkle of pumpkin pie spice can evoke the flavors of the season.
– Winter: Citrus fruits like orange or grapefruit can add a refreshing zing to your discs. Consider using zested citrus in the yogurt for a burst of flavor.
Storage Tips for Frozen Chocolate Chip Yogurt Discs
Once you’ve made your delicious Frozen Chocolate Chip Yogurt Discs, proper storage is essential to maintain their texture and flavor. Here are some practical tips:
Ideal Storage Conditions
To ensure your yogurt discs stay fresh, follow these storage guidelines:
– Airtight Containers: Store the discs in a single layer in an airtight container. This prevents them from absorbing any unwanted odors from the freezer and protects their texture. You can also use zip-lock bags, but be sure to remove as much air as possible before sealing.
– Layering: If stacking the discs, place parchment paper between layers to prevent them from sticking together.
Shelf Life
Frozen Chocolate Chip Yogurt Discs can be kept in the freezer for up to 2 to 3 months without compromising their quality. However, for the best taste and texture, try to consume them within the first month. Over time, frozen items can develop freezer burn, which can affect flavor and texture.
Serving Suggestions: Enjoying Your Frozen Treats
Your Frozen Chocolate Chip Yogurt Discs can be enjoyed in various delightful ways. Here are some serving suggestions that can enhance the experience:
Pairing Ideas
To create a more complete dessert experience, consider these pairing ideas:
– Fresh Fruits: Serve your yogurt discs with a side of fresh fruit. Slices of banana, fresh strawberries, or even a handful of blueberries can complement the flavors beautifully.
– Drizzle of Honey: A light drizzle of honey or agave syrup adds a touch of sweetness and pairs wonderfully with the tanginess of yogurt.
– Sprinkle of Nuts: For an added crunch, sprinkle some chopped nuts on the yogurt discs just before serving. This not only enhances the texture but also adds a nutty flavor.
Presentation
If you’re serving these treats at a gathering or party, presentation is key. Here are some tips to make your Frozen Chocolate Chip Yogurt Discs visually appealing:
– Plating: Arrange the yogurt discs on a decorative platter, spacing them out for an elegant look. Garnish with fresh mint leaves or edible flowers for a pop of color.
– Individual Servings: Consider placing each disc in a small cupcake liner for easy serving and a fun presentation. This makes them easy to grab and enjoy.
– Dessert Bar: Create a frozen yogurt disc dessert bar where guests can mix and match their favorite toppings. Provide options like crushed nuts, sprinkles, and various sauces for a customized treat.
Conclusion: A Deliciously Healthy Treat
Frozen Chocolate Chip Yogurt Discs are a delightful and healthy dessert option that is not only easy to make but also highly customizable. The key ingredients, primarily Greek yogurt, offer a wealth of nutritional benefits, including probiotics and protein, making these treats a guilt-free indulgence.
With the versatility of flavors, mix-ins, and toppings, you can create a unique frozen dessert that suits any palate. Whether you’re serving them at a party, enjoying them as a midday snack, or treating yourself after dinner, these yogurt discs are sure to please.
Embrace your creativity in the kitchen and enjoy the satisfaction of crafting delicious and nutritious snacks at home. The next time you crave something sweet, remember that your Frozen Chocolate Chip Yogurt Discs are just a few simple steps away!