
Indulge in Flavor: Crispy Garlic Shrimp Tacos Recipe
Introduction
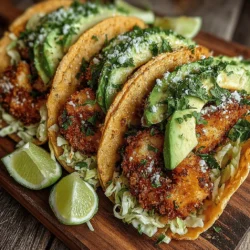
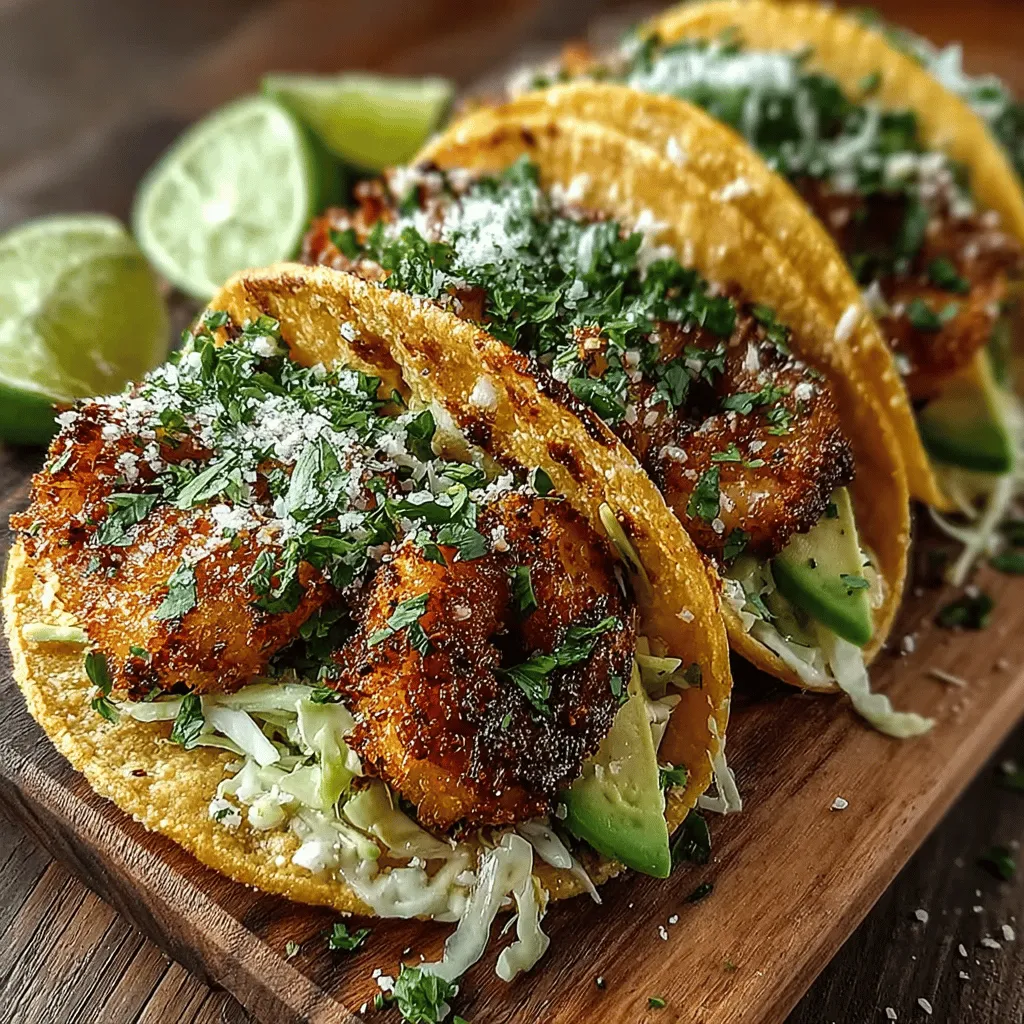
Discover the vibrant flavors of the sea with our Crispy Garlic Shrimp Tacos. These delectable tacos feature succulent shrimp coated in a crunchy panko breadcrumb crust, topped with fresh ingredients, and drizzled with a zesty sauce that perfectly complements the seafood. Whether you’re looking for a quick weeknight meal or a dish that will wow guests at your next gathering, these tacos promise to deliver on taste and presentation. In this article, we will explore the recipe, preparation techniques, and serving suggestions that will elevate your taco night to a whole new level.
Understanding the Ingredients
To create the perfect Crispy Garlic Shrimp Tacos, it’s essential to understand the ingredients that come together to form this delightful dish. Each component plays a vital role in achieving the balance of flavors and textures that make these tacos irresistible.
– Shrimp: The star of the dish is undoubtedly the shrimp. For the best results, opt for large, fresh shrimp. When selecting shrimp, look for those that are firm, have a slightly translucent appearance, and smell like the ocean rather than fishy. Fresh shrimp not only provide a better taste but also contribute to a tender texture. Additionally, shrimp are a great source of protein, omega-3 fatty acids, and various vitamins and minerals, making them a healthy choice for any meal.
– Breading Essentials: The crispy coating is what sets these tacos apart. Panko breadcrumbs are the secret to achieving a light and crunchy texture. Unlike traditional breadcrumbs, panko is made from crustless bread and has a coarser texture, which allows it to absorb less oil while frying. All-purpose flour is also necessary for the breading process, as it helps the egg adhere to the shrimp, ensuring that the panko clings effectively during frying.
– Flavor Enhancers: To elevate the taste of the shrimp, we incorporate garlic, smoked paprika, and cayenne pepper. Garlic is a key ingredient that infuses the shrimp with rich flavor, while smoked paprika adds a subtle smokiness that enhances the overall dish. A dash of cayenne pepper introduces a gentle heat, balancing the flavors beautifully. Together, these ingredients create a mouthwatering flavor profile that will have you coming back for more.
– Taco Components: No taco is complete without fresh toppings. For our Crispy Garlic Shrimp Tacos, we recommend shredded cabbage for crunch, creamy avocado for richness, and fresh cilantro for a burst of flavor. Each topping complements the crispy shrimp, adding layers of texture and freshness that elevate the dish.
Marinating the Shrimp for Maximum Flavor
One of the most critical steps in preparing these Crispy Garlic Shrimp Tacos is the marination process. Marinating the shrimp not only enhances its flavor but also improves the texture, making every bite more succulent.
– Flavor Infusion: Marinating shrimp allows the flavors of the ingredients to penetrate the flesh, resulting in a more flavorful dish. The combination of garlic, smoked paprika, and a touch of cayenne pepper creates a marinade that transforms the shrimp into a flavor powerhouse.
– Marinade Ingredients: To create a simple yet effective marinade, mix minced garlic, smoked paprika, cayenne pepper, olive oil, and a pinch of salt. Each ingredient contributes unique qualities: garlic adds depth, smoked paprika provides a warm undertone, and cayenne offers a hint of heat. Moreover, olive oil not only helps to distribute the flavors evenly but also keeps the shrimp moist during cooking.
– Timing: For optimal flavor absorption, allow the shrimp to marinate for at least 30 minutes, but no more than 2 hours. This timeframe is ideal for allowing the flavors to meld without overpowering the delicate taste of the shrimp. If time permits, marinating longer can deepen the flavor even further, but be cautious not to exceed the 2-hour mark, as the acid can start to break down the shrimp’s texture.
The Art of Breading Shrimp
Once your shrimp are marinated and ready to go, it’s time to set up a breading station. Proper organization in the kitchen can make all the difference in achieving a perfect coating on your shrimp.
– Setting Up a Breading Station: To streamline the breading process, arrange your workspace with three shallow dishes. In the first dish, place the all-purpose flour; in the second, whisk together eggs; and in the third, pour in the panko breadcrumbs. Having everything in place will help you work quickly and efficiently, ensuring that the shrimp get the perfect coating.
– Step-by-Step Breading Technique: Begin by taking a marinated shrimp and dredging it in the flour, ensuring it’s completely coated. This step is crucial, as it creates a dry surface that helps the egg adhere. Next, dip the floured shrimp into the whisked eggs, allowing any excess to drip off. Finally, roll the shrimp in the panko breadcrumbs, pressing gently to ensure an even coating. Repeat this process for each shrimp, placing them on a plate or baking sheet lined with parchment paper as you go.
– Tips for Perfect Coating: To ensure that the breading adheres well, make sure the shrimp are dry before starting the process. Pat them down with a paper towel if necessary. Additionally, using one hand for the wet ingredients (egg) and the other for the dry (flour and panko) can help keep your fingers from becoming too sticky and make the process smoother overall.
Frying the Shrimp to Crispy Perfection
The final step in creating your Crispy Garlic Shrimp Tacos is frying the shrimp to golden-brown perfection. This technique ensures that the shrimp are crispy on the outside while remaining juicy on the inside.
Frying shrimp can be intimidating, but with the right approach, you can achieve a deliciously crispy result. Start by heating a few inches of oil in a heavy-bottomed pan or deep fryer to 350°F (175°C). Carefully add the breaded shrimp in batches, making sure not to overcrowd the pan, which can lower the oil temperature and lead to soggy shrimp. Fry them for about 2-3 minutes on each side or until they are golden brown and cooked through.
Once fried, remove the shrimp and place them on a paper towel-lined plate to absorb any excess oil. This step is crucial for maintaining that delightful crunch that everyone loves in crispy shrimp tacos.
Now that the shrimp are perfectly fried and ready to go, you’re well on your way to assembling your Crispy Garlic Shrimp Tacos. Stay tuned for the next part of our article, where we will dive into assembling the tacos, creating the perfect sauce, and serving suggestions to impress your guests.
Choosing the Right Oil
When it comes to frying crispy garlic shrimp, the choice of oil is crucial for achieving the perfect texture and flavor. Ideally, you’ll want to select an oil with a high smoke point to ensure it can withstand the high temperatures needed for frying without burning.
Recommendations for Frying Oils
1. Canola Oil: With a smoke point of around 400°F (204°C), canola oil is a popular choice for frying. It has a neutral flavor that won’t overpower the shrimp or the garlic.
2. Peanut Oil: Known for its slightly nutty flavor, peanut oil has a smoke point of approximately 450°F (232°C). This makes it excellent for achieving crispy results.
3. Vegetable Oil: A blend of different oils, vegetable oil typically has a smoke point ranging between 400°F and 450°F (204°C-232°C). Its versatility and cost-effectiveness make it a common choice in many kitchens.
4. Sunflower Oil: With a smoke point of around 440°F (227°C), sunflower oil is another great option that can add a subtle flavor to your dish.
Important Note
Avoid using oils with low smoke points, like olive oil, for frying at high temperatures, as they can produce smoke and impart a bitter taste to your food.
Frying Instructions
Now that you’ve selected your oil, it’s time to fry the shrimp. Follow these detailed frying instructions to achieve perfectly crispy garlic shrimp.
Detailed Frying Times and Methods
1. Heat the Oil: In a deep skillet or heavy-bottomed pot, pour in enough oil to submerge the shrimp (about 2 inches deep). Heat the oil over medium-high heat until it reaches 350°F (175°C). Use a kitchen thermometer to monitor the temperature; this is crucial for preventing soggy shrimp.
2. Fry in Batches: To avoid crowding the pan, fry the shrimp in batches. Carefully add a single layer of shrimp to the hot oil, ensuring they have space to bubble and crisp up. Fry for about 2-3 minutes per side or until they turn golden brown and crispy.
3. Drain Excess Oil: Once cooked, use a slotted spoon to remove the shrimp from the oil and transfer them to a plate lined with paper towels. This will help absorb any excess oil and keep the shrimp crispy.
4. Repeat: Continue frying the remaining shrimp, allowing the oil to return to temperature between batches.
Cooking Tips
– Do Not Overcrowd: Frying too many shrimp at once can lower the oil temperature and lead to greasy, soggy shrimp.
– Monitor Temperature: Keeping the oil at the right temperature is key. If the oil is too hot, the shrimp will burn; if it’s too cool, they will absorb too much oil.
Safety Tips
Frying can be hazardous if not done properly. Here are some essential safety tips to keep in mind:
1. Use a Deep Pot: A deep pot helps contain any potential splatter from the hot oil.
2. Avoid Water: Make sure the shrimp are dry before adding them to the oil, as water can cause the oil to splatter dangerously.
3. Keep a Lid Nearby: In case of a fire, keep a lid nearby to smother the flames rather than using water.
4. Use Oven Mitts: Protect your hands and arms from hot oil splatters by wearing oven mitts.
Warming the Tortillas
Properly warmed tortillas are essential for a delightful taco experience. They enhance the overall flavor and texture, allowing the shrimp and toppings to shine.
Importance of Properly Warmed Tortillas
Warming tortillas not only softens them but also makes them more pliable, preventing them from cracking when filled. This step is crucial for a satisfying taco.
Methods for Warming
1. Skillet Method: Heat a dry skillet over medium heat. Place each tortilla in the skillet for about 30 seconds on each side, or until warm and slightly toasted. This method adds a lovely charred flavor.
2. Open Flame: For a smoky flavor, use tongs to hold the tortilla directly over a gas flame for a few seconds on each side. Be cautious not to burn them; you want a slight char, not charred black.
3. Microwave: If you’re short on time, stack tortillas on a microwave-safe plate, cover with a damp paper towel, and microwave in 15-second intervals until warm.
4. Oven: Wrap a stack of tortillas in aluminum foil and place them in a preheated oven at 350°F (175°C) for about 10-15 minutes.
Choosing Your Tortilla
When it comes to tortillas, you have two main options: corn or flour.
– Corn Tortillas: Traditional for tacos, corn tortillas are gluten-free and have a distinct flavor that pairs beautifully with shrimp. They tend to be more delicate, so be gentle when handling them.
– Flour Tortillas: These are softer and more pliable, making them an excellent choice if you prefer a sturdier taco. They have a milder taste, which can be a great canvas for the bold flavors of the shrimp and toppings.
Assembling the Tacos
Now that your shrimp are perfectly fried and your tortillas are warmed, it’s time to assemble your tacos for an explosion of flavors.
Layering Techniques
1. Start with the Base: Lay the warm tortilla flat on a plate. Start by adding a generous layer of the crispy garlic shrimp at the center.
2. Add Fresh Ingredients: Follow with your choice of toppings—fresh cabbage adds crunch, while diced tomatoes contribute juiciness. Be sure to distribute them evenly for balanced flavor in every bite.
3. Sauce it Up: Drizzle with a zesty sauce such as lime crema or a spicy aioli to enhance the flavor profile.
Topping Suggestions
– Fresh Herbs: Cilantro or parsley can brighten up the taco with freshness.
– Creamy Options: Sour cream or Greek yogurt are excellent choices for adding creaminess.
– Salsas: Consider a fresh pico de gallo, mango salsa, or avocado salsa for added depth.
– Spicy Elements: If you enjoy heat, top your tacos with sliced jalapeños or a drizzle of hot sauce.
Serving Suggestions and Pairings
Enhance your dining experience with thoughtful plating and drink pairings.
Presentation Ideas
– Plating: Arrange the assembled tacos on a platter and garnish with lime wedges and fresh herbs for a colorful presentation.
– Serving Style: Serve with a side of tortilla chips and salsa for a complete meal.
Beverage Pairings
To complement the flavors of the crispy garlic shrimp tacos, consider these drink options:
– Margaritas: A classic pairing, the citrusy notes of a margarita enhance the shrimp’s flavor.
– Cerveza: Light Mexican beers such as Corona or Pacifico are refreshing choices that balance the richness of the tacos.
– Sparkling Water: For a non-alcoholic option, pair with sparkling water infused with lime or cucumber.
Nutritional Information
Understanding the nutritional content of your dish helps you appreciate its value and health benefits.
Caloric Breakdown
A serving of crispy garlic shrimp tacos typically contains around 300-400 calories, depending on the specific ingredients and cooking methods used. This count includes the shrimp, tortillas, and basic toppings.
Health Benefits
Shrimp is an excellent source of lean protein and is low in calories, making it a nutritious choice. Additionally, they are rich in essential nutrients like selenium, vitamin B12, and omega-3 fatty acids. Fresh toppings, such as vegetables and herbs, provide vitamins and antioxidants, contributing to a well-rounded meal.
Conclusion
Crispy Garlic Shrimp Tacos bring a delightful burst of flavor and texture to your dining table. With careful preparation and fresh ingredients, this recipe is sure to impress. Whether it’s a weeknight dinner or a gathering with friends, these tacos are a crowd-pleaser that balances taste and simplicity. Enjoy crafting these delicious tacos and savoring every bite!