Introduction
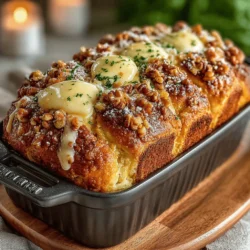
Discover the perfect blend of comfort and flavor with our Cinnamon Sweet Apple Bliss recipe. This delightful pull-apart bread combines the warmth of cinnamon and the sweetness of apples, creating a unique treat that is ideal for breakfast, brunch, or dessert. Imagine the aroma of freshly baked bread mingling with the spiced scent of cinnamon and the fruity notes of apples wafting through your kitchen—it’s an experience that will not only tantalize your taste buds but also evoke feelings of home and nostalgia.
Cinnamon Sweet Apple Bliss is more than just a recipe; it is a celebration of flavors and textures that come together harmoniously. The soft, fluffy texture of the bread makes it irresistibly tender, while each bite reveals a medley of sweet apple pieces enveloped in a warm cinnamon sugar filling. This recipe is not only easy to follow but also allows for variations, making it a versatile dish suitable for any occasion. Whether you’re hosting a family gathering, enjoying a quiet weekend brunch, or simply satisfying a sweet craving, this dish is sure to become a beloved staple in your home.
In this article, we will guide you through the process of creating this delectable dish, from selecting the right ingredients to baking it to perfection. We will start with an overview of the essential ingredients, followed by the key steps to prepare the dough, let it rise, and craft the delightful apple filling that makes this recipe truly shine.
Understanding the Ingredients
To create the perfect Cinnamon Sweet Apple Bliss, it’s crucial to understand the role of each ingredient. The combination of these elements not only contributes to the flavor but also affects the texture and overall success of the bread.
– All-Purpose Flour: The foundation of our dough, all-purpose flour provides the necessary structure. Its protein content helps create gluten, which is essential for the bread’s elasticity and chewiness.
– Active Dry Yeast: This is the key to achieving that fluffy texture we all love in baked goods. Yeast ferments the sugars in the dough, producing carbon dioxide that causes the dough to rise, resulting in a light and airy bread.
– Granulated and Brown Sugar: These two types of sugar balance sweetness and caramelization. Granulated sugar sweetens the dough, while brown sugar adds a rich, molasses flavor that enhances the overall taste of the filling.
– Whole Milk: Adding moisture and richness, whole milk contributes to the soft texture of the dough. The fat content in whole milk helps create a tender crumb, ensuring each bite is satisfying.
– Unsalted Butter: This ingredient enhances flavor and texture, providing richness that complements the sweetness of the apples and the warmth of the cinnamon.
– Eggs: Acting as a binding agent, eggs enrich the dough and help create a cohesive texture. They also contribute to the bread’s golden color once baked.
– Apples: The star ingredient, apples provide freshness and flavor. Choosing the right apple variety will enhance the overall taste of the bread.
– Ground Cinnamon and Vanilla Extract: These aromatic ingredients infuse the bread with warmth and depth, creating that comforting flavor profile we associate with baked goods.
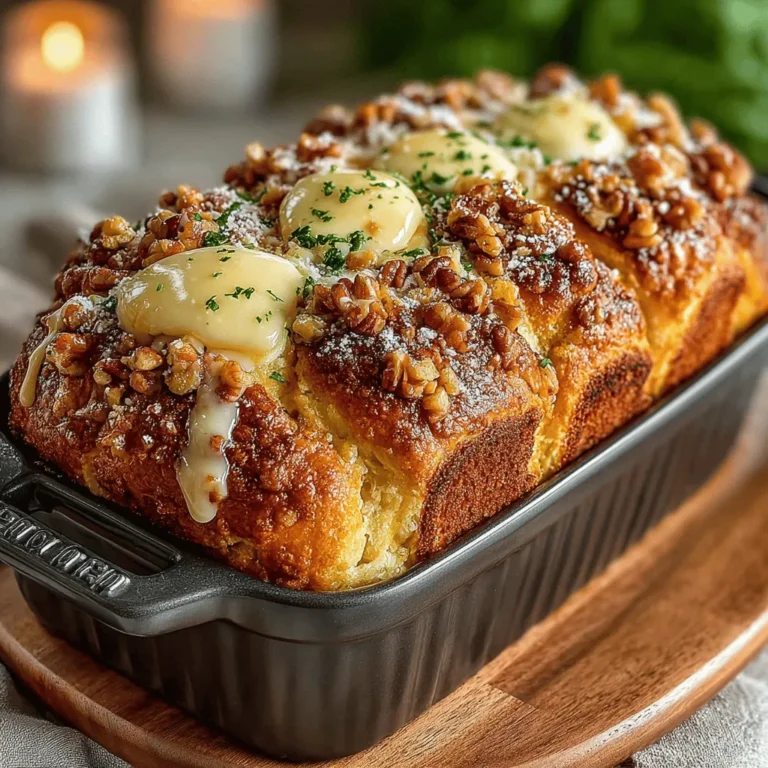
– Nuts (Optional): Adding a crunch to the filling, nuts such as walnuts or pecans can provide a delightful contrast to the softness of the dough and the apples.
Preparing the Dough
Now that we have a clear understanding of the ingredients, let’s dive into the first steps of preparing our dough, which will set the foundation for our Cinnamon Sweet Apple Bliss.
Activating the Yeast for Perfect Rise
The first step in making our dough involves activating the yeast, which is critical for achieving the desired rise. Begin by warming the whole milk to about 110°F (43°C). This temperature is ideal for yeast activation, as it is warm enough to awaken the yeast without being too hot, which could kill it. Combine the warm milk with a tablespoon of granulated sugar, stirring gently until dissolved. Then, sprinkle the active dry yeast over the surface of the milk and sugar mixture. Allow it to sit for about 5 to 10 minutes until it becomes frothy. This foamy texture indicates that the yeast is alive and ready to work its magic.
Mixing the Dry Ingredients for Stability
While the yeast is activating, it’s time to prepare the dry ingredients. In a large mixing bowl, whisk together the all-purpose flour, remaining granulated sugar, and a pinch of salt. The salt not only enhances flavor but also plays a role in regulating yeast activity, preventing the dough from rising too quickly. Ensure that the dry ingredients are evenly combined, as this will help create a stable dough.
Combining Ingredients: Creating a Smooth Dough
Once the yeast is activated and frothy, it’s time to bring everything together. Create a well in the center of the dry ingredients and pour in the yeast mixture along with the melted unsalted butter and beaten eggs. Using a wooden spoon or a spatula, gently mix the ingredients until they begin to form a cohesive dough. It’s essential to combine the wet and dry ingredients effectively to avoid any dry pockets of flour. If the mixture appears too sticky, you can add a little more flour, one tablespoon at a time, until you achieve a manageable dough consistency.
Kneading to Achieve Elasticity
After the ingredients are combined, it’s time to knead the dough, which is a crucial step for developing gluten. Turn the dough out onto a floured surface and begin kneading by pushing the dough away from you with the heel of your hand, then folding it back over itself. Rotate the dough a quarter turn and repeat this process for about 8 to 10 minutes. The goal is to achieve a smooth, elastic texture that springs back when pressed. If the dough feels too sticky during kneading, sprinkle a little more flour on the surface to prevent it from sticking.
Letting the Dough Rise
Understanding the First Rise
After kneading, place the dough in a lightly greased bowl and cover it with a clean kitchen towel or plastic wrap. This first rise is essential for developing the bread’s texture. During this time, the yeast will consume the sugars, producing carbon dioxide that causes the dough to expand. The optimal rising conditions are a warm, draft-free environment; consider placing the bowl in an oven preheated to the lowest setting for just a few minutes before turning it off, then leaving the door closed. Allow the dough to rise for about 1 to 1.5 hours, or until it has doubled in size.
Crafting the Apple Filling
As your dough rises, you can begin preparing the apple filling, which is the heart of our Cinnamon Sweet Apple Bliss. Selecting the right apples is crucial for achieving the desired flavor and texture. Varieties such as Granny Smith, Honeycrisp, or Fuji are excellent choices due to their balance of sweetness and tartness, which complements the cinnamon beautifully.
Selecting the Right Apples
When selecting apples for this recipe, look for firm, crisp varieties that hold their shape during baking. Once you have your apples, it’s time to prepare them. Start by peeling, coring, and dicing the apples into small chunks. This will ensure that they cook evenly and blend seamlessly into the filling. Toss the diced apples in a mixture of brown sugar and ground cinnamon to coat them evenly, enhancing their flavor and creating a delicious filling that will be nestled within the layers of dough.
With your dough rising and apple filling prepared, you are well on your way to creating a delightful treat that will fill your home with the irresistible aroma of cinnamon and fresh apples. In the upcoming sections of this article, we will guide you through the assembly and baking process, ensuring that your Cinnamon Sweet Apple Bliss turns out perfectly every time.
Mixing the Filling Ingredients
The key to an exceptional Cinnamon Sweet Apple Bliss lies in the filling. Begin by preparing the filling mixture that will elevate the apples’ natural sweetness.
Start with brown sugar and ground cinnamon. The rich, caramel-like flavor of brown sugar complements the apples beautifully, enhancing their natural sweetness and providing a depth of flavor that white sugar simply cannot achieve. The warm spice of cinnamon adds a cozy warmth, making each bite a comforting experience.
Optional: Incorporating Nuts for Added Texture
For those looking to add a bit of crunch to the soft, fluffy bread, consider incorporating chopped nuts into the filling. Walnuts or pecans work particularly well, adding a delightful texture contrast to the tender apples. Simply mix in about half a cup of your chosen nuts with the brown sugar and cinnamon, ensuring an even distribution throughout the filling. This addition not only enhances the flavor but also provides a nutty richness that complements the sweetness of the apples.
Shaping the Bread
Dividing and Forming the Dough
Once the filling is prepared, it’s time to shape the dough. Begin by dividing your risen dough into equal portions. This ensures that each piece will bake evenly, resulting in a uniform pull-apart bread. A sharp knife or a bench scraper can be used to cut the dough into small sections, typically around 12 to 16 pieces, depending on your desired size.
Next, flatten each portion into a disc. Use your hands or a rolling pin to gently flatten the dough, making sure to keep the thickness consistent—about half an inch works best. This step is crucial as it prepares the dough for the filling, allowing for an easy wrap around the sweet apple mixture without tearing.
Filling and Sealing the Dough
Now comes the fun part: filling and sealing the dough. Take a flattened disc and place a generous spoonful of the apple filling in the center. Carefully fold the edges of the dough over the filling to create a ball, pinching the seams to seal it tightly. It’s essential to seal the dough well to prevent any leaks during baking, which could result in a messy oven and soggy bread.
Repeat this process for each piece of dough, ensuring each ball is filled adequately but not overstuffed, as this could also lead to leaks. Once you’ve created all the filled dough balls, set them aside for the next step.
Assembling the Pull-Apart Bread
Greasing the Loaf Pan
Before you can bake your sweet creation, you need to prepare your loaf pan. Proper greasing is essential to ensure that your Cinnamon Sweet Apple Bliss releases easily after baking. Use a generous amount of butter or baking spray to coat the interior of the pan thoroughly. This will not only help with removal but will also add a lovely buttery flavor to the crust.
Arranging the Filled Dough in the Pan
Now, it’s time to arrange your filled dough balls in the greased loaf pan. You can stack them neatly or arrange them in a more whimsical, haphazard manner for a rustic look. Consider placing them in a staggered pattern so that the edges of the dough balls touch, creating an inviting pull-apart effect when baked. This creative arrangement will also enhance the visual appeal of the final product, making it a stunning centerpiece for any table.
The Second Rise
Understanding the Importance of the Second Rise
After assembling your dough balls in the pan, it’s crucial to allow them to undergo a second rise. This step is vital for achieving the light, airy texture characteristic of a perfect pull-apart bread. The second rise allows the gluten to relax and expand, resulting in a fluffier end product.
To ensure the best results, cover the loaf pan with a clean kitchen towel or plastic wrap and place it in a warm, draft-free area. This might take anywhere from 30 minutes to 1 hour, depending on your kitchen temperature. The dough should rise until it has doubled in size, filling the spaces between the dough balls.
Tips for Best Practices During This Phase
Keep an eye on your dough during the second rise. If your kitchen is particularly cool, consider placing it in a slightly warm oven (turned off) or near a sunny window. Avoid rushing this phase, as a proper rise will greatly enhance the texture of your finished bread.
Baking to Perfection
Preheating the Oven
As your dough rises, it’s time to prepare your oven. Preheat it to 350°F (175°C). Timing your preheating with the second rise is crucial; the oven should be ready by the time the dough has completed its rise. This ensures that the bread goes into a hot environment, promoting optimal oven spring and a beautiful golden crust.
Baking and Achieving the Golden Brown Finish
Once your dough has risen beautifully, it’s time to bake. Place the loaf pan in the preheated oven and set a timer for about 30-35 minutes. To check for doneness, look for a golden brown finish on the top of the bread. You can also tap the top lightly; if it sounds hollow, your bread is likely done.
Understanding the science behind baking helps; the heat causes the moisture in the dough to create steam, which aids in rising. As the bread bakes, the sugars caramelize, resulting in a beautiful crust.
Cooling and Serving
The Cooling Process
After pulling the bread from the oven, allow it to cool in the pan for about 10-15 minutes. This cooling process is crucial for ensuring that the bread holds its shape when you remove it from the pan. If you attempt to remove it too soon, it may collapse or stick to the sides.
Once adequately cooled, carefully invert the loaf onto a wire rack to cool completely. This will help maintain its texture and prevent it from becoming soggy at the bottom.
Serving Suggestions
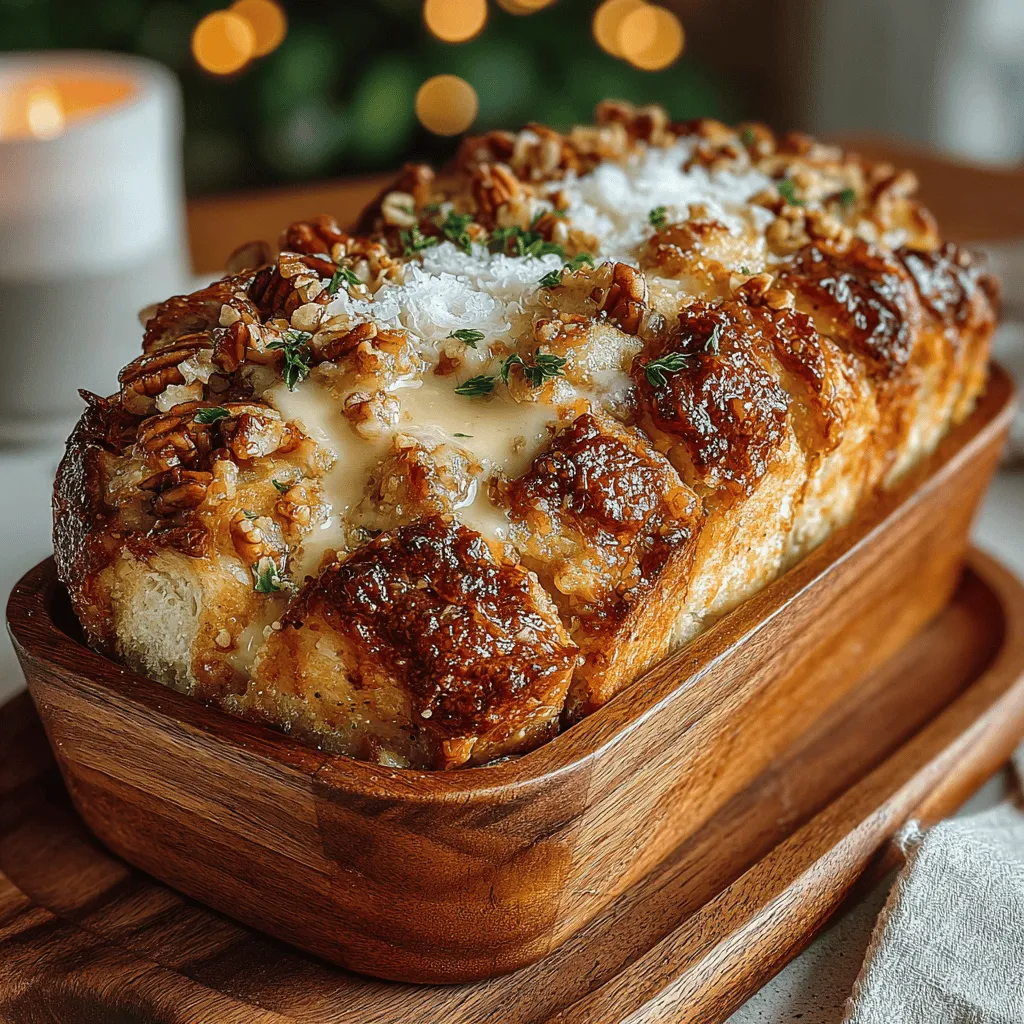
When it comes to serving your Cinnamon Sweet Apple Bliss, the possibilities are endless. For a delightful breakfast, serve slices warm with a pat of butter or a drizzle of honey. If you’re looking to impress at brunch, consider pairing it with cream cheese spread or whipped cream for a decadent touch.
For an extra indulgent treat, serve it alongside a scoop of vanilla ice cream or a dollop of fresh whipped cream. You can also sprinkle a bit of powdered sugar over the top for an elegant finish that enhances its visual appeal.
Conclusion
In conclusion, the Cinnamon Sweet Apple Bliss is more than just a recipe; it’s an experience that brings together the warmth of home-baked goods and the joy of sharing delicious food with loved ones. With its simple yet effective techniques, this pull-apart bread is accessible for bakers of all levels. By following the steps outlined in this guide, you will create a delightful treat that will fill your kitchen with a comforting aroma and your heart with warmth.
Embrace the process of baking, and don’t forget to share the fruits of your labor with family and friends. Enjoy the sweet moments that this recipe will undoubtedly create, and relish in the satisfaction of serving a homemade delight that is both visually stunning and irresistibly delicious.