
Indulging in Chocolate-Coconut Bliss Bites: A Sweet Journey into No-Bake Delights
Have you ever had one of those days where you crave something sweet but also want to keep it wholesome? I certainly have. There was a chilly afternoon last winter when I found myself rummaging through my pantry, searching for a treat that would satisfy my sweet tooth without the guilt. That’s when I stumbled upon a bag of shredded coconut, a jar of almond flour, and a few other simple ingredients. With a little creativity and some experimentation, I created what I now affectionately call Chocolate-Coconut Bliss Bites.
These delightful little treats not only bring joy to my palate but also offer a nourishing boost, making them perfect for a quick snack or a satisfying dessert. They are no-bake, which means you can whip them up without turning on the oven, making them ideal for hot summer days or whenever you’re short on time. The combination of chocolate and coconut evokes a tropical paradise, and each bite is a testament to the harmony of flavors and textures. So, let’s dive into the delicious world of these blissful bites and explore how to make them at home!
Gathering the Ingredients for Bliss
To whip up a batch of these Chocolate-Coconut Bliss Bites, you’ll need a handful of wholesome ingredients. Each one plays a crucial role in crafting the perfect flavor and texture. The beauty of this recipe lies in its simplicity, as it focuses on natural ingredients that not only taste great but also offer nutritional benefits.
Here’s what you’ll need:
– Unsweetened Shredded Coconut: This provides the chewy, tropical flavor that pairs beautifully with chocolate. Coconut is rich in dietary fiber and healthy fats, making it a great ingredient for energy-boosting snacks.
– Almond Flour: A healthy alternative to regular flour, almond flour adds a nutty taste and keeps the bites gluten-free. It is also a good source of protein, healthy fats, and vitamin E, contributing to a wholesome treat.
– Cocoa Powder: This is where the chocolatey goodness comes from! Cocoa powder offers a rich flavor that balances the sweetness of the other ingredients and contains antioxidants, making it a healthier choice for chocolate lovers.
– Maple Syrup: A natural sweetener, maple syrup enhances the bites’ taste while keeping them refined sugar-free. It comes with a unique flavor profile and is packed with minerals like manganese and zinc.
– Coconut Oil: This adds moisture and a hint of coconut flavor, helping to bind the ingredients together. Coconut oil is known for its healthy medium-chain triglycerides (MCTs), which can provide quick energy.
– Vanilla Extract: Just a teaspoon of this aromatic essence elevates the flavor profile. Vanilla not only adds depth but also brings a warm sweetness to the bites.
– Salt: A pinch of salt helps to enhance all the flavors, balancing the sweetness and bringing out the richness of the chocolate and coconut.
– Dark Chocolate Chips: For that indulgent coating, dark chocolate chips add a luscious layer of sweetness. Dark chocolate is rich in antioxidants and has been linked to various health benefits, making it a guilt-free indulgence.
– Extra Shredded Coconut: Optional, but it’s a fun way to add texture and a decorative touch when rolling the finished bites. This step is perfect for those who want to enhance the visual appeal of their treats.
Crafting the Bliss Bites: A Step-by-Step Guide
Now that we have gathered all the ingredients, it’s time to roll up our sleeves and get started on crafting these delectable Chocolate-Coconut Bliss Bites. The process is straightforward and requires minimal equipment, making it accessible for both novice and experienced cooks.
1. Prepare Your Mixing Bowl: Start by selecting a large mixing bowl. This will be where all the magic happens, so choose one that gives you plenty of space to mix and combine the ingredients without spilling.
2. Combine the Dry Ingredients: In your mixing bowl, add the unsweetened shredded coconut, almond flour, cocoa powder, and a pinch of salt. Mix these dry ingredients together until they are well combined. This step ensures that the flavors are evenly distributed throughout the mixture.
3. Incorporate the Wet Ingredients: Next, create a well in the center of your dry ingredients and add the maple syrup, melted coconut oil, and vanilla extract. Using a spatula or your hands, begin to mix the ingredients together. The mixture will start to come together, forming a sticky dough-like consistency. If the mixture feels too dry, you can add a little more coconut oil or maple syrup to achieve the desired texture.
4. Fold in the Dark Chocolate Chips: Once the mixture is well combined, gently fold in the dark chocolate chips. This step adds an extra layer of indulgence to the bites. Make sure the chips are evenly distributed so that every bite is a delightful surprise.
5. Chill the Mixture: To make the next step easier, it’s a good idea to chill the mixture for about 15-20 minutes in the refrigerator. This will help it firm up and make rolling the bites much simpler.
As you prepare to roll your bliss bites, you may find yourself daydreaming about how delightful they will taste once they are finished. The anticipation builds as you approach the final steps of this easy and rewarding recipe.
Stay tuned as we continue this sweet journey into the world of Chocolate-Coconut Bliss Bites, where we will explore the rolling technique, optional toppings, and storage tips to keep your treats fresh!
Now that we have our ingredients ready, let’s get down to the fun part—making these blissful bites! The process is incredibly straightforward, making it perfect for both beginner cooks and seasoned chefs.
Instructions for Making Chocolate-Coconut Bliss Bites
Step 1: Mix the Dry Ingredients
To start off, grab a large mixing bowl and combine the unsweetened shredded coconut, almond flour, cocoa powder, and salt. Give it a good stir until everything is well mixed. This blend of dry ingredients creates a delightful nutty and chocolaty base for your bliss bites.
Step 2: Prepare the Wet Mixture
In a separate bowl, mix the melted coconut oil, maple syrup, and vanilla extract until combined. The coconut oil not only enhances the flavor but also helps bind everything together. Once fully mixed, pour this wet mixture into the dry ingredients. Stir until a sticky dough forms. If the dough feels too dry, don’t hesitate to add a splash of water or a bit more maple syrup to achieve the right consistency. The dough should be moist enough to hold together when rolled.
Step 3: Shape the Bites
Once your dough is ready, it’s time to shape your bites. With your hands, scoop out about one tablespoon of the mixture and roll it into a ball. Repeat this process until you’ve formed around 12-15 balls—perfect for sharing (or keeping all to yourself!). The key is to ensure they are compact enough to hold their shape during chilling and coating.
Step 4: Chill the Bites
Next, arrange the balls on a parchment-lined baking tray and pop them into the refrigerator for about 30 minutes. This chilling time helps them firm up nicely, making them easier to coat later. While you wait, you can clean up your workspace and prepare for the next step.
Step 5: Prepare the Chocolate Coating
While the bites are chilling, prepare for the chocolate coating. Melt the dark chocolate chips in a heatproof bowl either in the microwave (be sure to do it in 30-second intervals for even melting) or using a double boiler until smooth. Stir the chocolate gently to ensure it does not burn, and achieve a silky texture.
Step 6: Coat the Bites
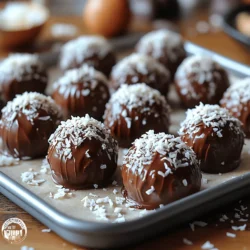
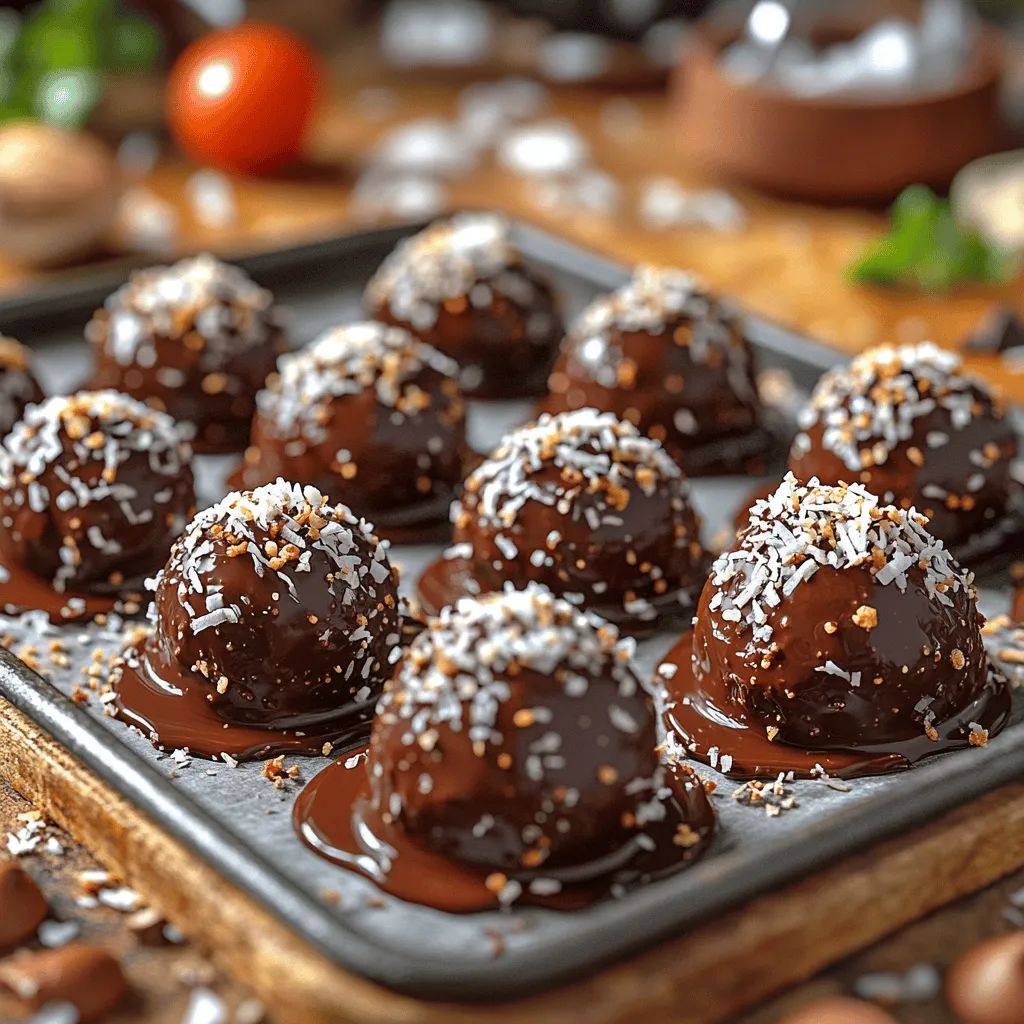
After the bliss balls have chilled, take them out of the refrigerator and dip each one into the melted chocolate, ensuring they’re fully coated. This layer not only adds a rich flavor but also a beautiful glossy finish. Place them back on the parchment-lined tray. If you’re feeling a bit extra, roll some of the balls in additional shredded coconut for a beautiful finish. This adds a nice texture and enhances the coconut flavor.
Step 7: Set the Chocolate
To set the chocolate, return the tray to the refrigerator for another 15-20 minutes. This step is crucial to ensure that the chocolate hardens properly, giving your bliss bites a delightful crunch when you bite into them. Once the chocolate is firm, your Chocolate-Coconut Bliss Bites are ready to be enjoyed!
Tips & Tricks for Perfect Bliss Bites
Making these Chocolate-Coconut Bliss Bites is simple, but a few tips can enhance your experience:
– Customize Your Sweetness: If you prefer your bites a little sweeter, feel free to adjust the amount of maple syrup according to your taste. You can also experiment with other natural sweeteners like agave nectar or honey.
– Experiment with Add-ins: Consider adding chopped nuts, dried fruits, or even a sprinkle of cinnamon for an extra flavor kick. Ingredients like chopped almonds or walnuts can add a satisfying crunch, while dried cranberries or raisins provide a hint of tartness.
– Use Quality Chocolate: Opt for high-quality dark chocolate to ensure a rich and satisfying coating. This not only enhances the flavor but also contributes to the overall texture of the bites. Look for chocolate with a cocoa content of at least 70% for the best results.
– Keep It Cool: Store the bites in the refrigerator to maintain their firmness and freshness. These bites can last for up to a week in the fridge, making them a great make-ahead treat for busy days.
Delicious Variations to Try
While the original recipe is a winner, there are countless ways to mix it up and make these bliss bites your own. Here are some delicious variations to try:
Peanut Butter Bliss Bites
Incorporate creamy peanut butter into the mixture for an added layer of flavor. Simply replace some of the coconut oil with peanut butter, and enjoy the delightful combination of chocolate and peanut butter.
Matcha Bliss Bites
For a unique twist, add a teaspoon of matcha powder to the dry ingredients. This will give your bites a vibrant green color and a subtle earthy flavor, along with a boost of antioxidants.
Coconut Almond Joy Bites
Transform your bliss bites into a version reminiscent of the classic Almond Joy candy bar. Add whole almonds into the center of each ball before coating them in chocolate, and sprinkle toasted coconut on top for added texture.
Spiced Bliss Bites
Add a pinch of cayenne pepper or chili powder to the mix for a spicy kick. The heat from the spices complements the sweetness of the chocolate and coconut, creating an exciting flavor profile that will surprise your taste buds.
Fruit and Nut Bliss Bites
Incorporate dried fruits like apricots, figs, or dates, along with chopped nuts like pecans or hazelnuts. This addition not only enhances the flavor but also adds extra texture, making your bliss bites even more satisfying.
Serving Suggestions
These Chocolate-Coconut Bliss Bites are perfect for a variety of occasions. Here are some serving suggestions to elevate your experience:
– Snack Time: Enjoy these bites as a quick and nutritious snack between meals. They provide a good balance of healthy fats, fiber, and natural sweetness.
– Dessert Platter: Serve them on a dessert platter alongside fresh fruit and other treats for a colorful and enticing presentation at parties or gatherings.
– Gift Giving: Package the bites in a decorative box or jar and give them as a thoughtful gift to friends and family. Homemade treats are always appreciated and make for a delightful surprise.
– Post-Workout Fuel: These bliss bites provide a great source of energy after a workout, making them an ideal choice for athletes or anyone looking to refuel after physical activity.
Conclusion
In conclusion, Chocolate-Coconut Bliss Bites are a simple yet indulgent treat that combines the richness of chocolate with the tropical flavor of coconut. With easy-to-follow instructions and the flexibility to customize, these bites are perfect for any occasion. Whether you’re satisfying a sweet tooth, looking for a nutritious snack, or preparing a homemade gift, these bliss bites are sure to impress.
So go ahead, gather your ingredients, and treat yourself to these delightful bites. Once you try them, you’ll be hooked on their deliciousness and the joy of making them. Enjoy your culinary creation, and don’t forget to share your experience and any variations you try! Happy baking!